Reusable Sandwich Bag and Lunch Set

Before I dive in too far, I need to tell you who won the apron I shared on Studio 5 on Thursday!
I know there was a problem with my web page the day of the contest. Thanks for your patience! Thank you for all your kind comments! All entries (even the ones not showing now on the blog) were used to pick the winner.
The winner is... JANA, who said:
David and Jana said... That is brilliant. I loved all your ideas today on Studio 5. You are so creative. Thank you for sharing.
Thank you Jana! I will be contacting you shortly.
Back to the Bag Tutorial
My daughter has been begging me since school started, to make her a "cute," lunch bag. I figured for $1, I could do it.
What you need:
1 large reusable shopping bag
Scissors
Sewing Machine
Let's get started!
Cut the sides and bottom off the bag. You will end up using almost every inch of your bag for this project.

Cut one side of your bag into strips, so wherever you plan to sew is about as wide as a regular sandwich bag. I did mine a little wider, to leave room for the large sandwiches we have, because we only have homemade bread, and the slices are larger.
Note - I don't know why, but I didn't get a picture of this... For the sandwich bag, you will want to use a strip of the front or back, and a strip of the side. Place wrong sides together, and tuck the bottom under the top lip, like this:

You can cut it to whatever length you feel you will want it to be. Just play with it until you get what you are looking for.
This is a photo of the snack bag - same process, but you only use the one strip. It just won't be big enough to fit a sandwich.

You are going to be sewing over this, to hold it in place. You are looking at what will be the lined, inside of the bag.
See how it's zigzagged after?

Then, same thing for the sandwich bag... fold it up to where you want it. I decided to have the TJ Maxx label inside.

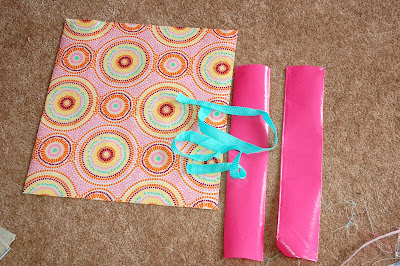
This is what I had left over after making 2 sandwich bags and 3 snack bags... Part of one side, the straps, and the bottom.
Cut the bag front and back to whatever size you think you will need for the lunch bag. I made one front/back piece longer than the other, so I could turn it and sew it, and the top of the front and back would both have a finished edge.

Start sewing the sides on.


Then the bottom.
 Then sew the back to the sides.
Sew the bottom to the sides and back.


Should look like this. You will need to trim everything up, including the threads.

Turn it right side out.
 Reattach the straps. You can use a seam ripper to remove the old one if you want.
 You can add velcro to the top of the bag if you want.
 FINISHED!!!
You're child will be stylin' in the lunch room!
 You might also want to look at:
10 minute Apron - Reusable Bag
First Aid Kit - Reusable Bag
Reusable Lunch Set - Reusable Bag
Party Set - Reusable Bag
$.25 Wallet - Reusable Bag
DIY Jewelry Organizer - Reusable Bag
Pillow Sham - Reusable Bag
Have a Happy and Creative Day!
Risa


1 comment:
These are very nice! I have bought some re-usable snack bags, but have never thought to make them myself :-) These are so cute!
Post a Comment