Saturday, March 31, 2012

Reusable Lunch Set - sandwich and snack bags, and lunch bag {Reusable Shopping Bag - Part3}

Reusable Sandwich Bag and Lunch Set


Before I dive in too far, I need to tell you who won the apron I shared on Studio 5 on Thursday!

I know there was a problem with my web page the day of the contest. Thanks for your patience! Thank you for all your kind comments! All entries (even the ones not showing now on the blog) were used to pick the winner.

The winner is... JANA, who said:

David and Jana said... That is brilliant. I loved all your ideas today on Studio 5. You are so creative. Thank you for sharing.

Thank you Jana! I will be contacting you shortly.


Back to the Bag Tutorial

My daughter has been begging me since school started, to make her a "cute," lunch bag. I figured for $1, I could do it.

What you need:

1 large reusable shopping bag
Scissors
Sewing Machine

Let's get started!

Cut the sides and bottom off the bag. You will end up using almost every inch of your bag for this project.


Cut one side of your bag into strips, so wherever you plan to sew is about as wide as a regular sandwich bag. I did mine a little wider, to leave room for the large sandwiches we have, because we only have homemade bread, and the slices are larger.

Note - I don't know why, but I didn't get a picture of this... For the sandwich bag, you will want to use a strip of the front or back, and a strip of the side. Place wrong sides together, and tuck the bottom under the top lip, like this:


You can cut it to whatever length you feel you will want it to be. Just play with it until you get what you are looking for.

This is a photo of the snack bag - same process, but you only use the one strip. It just won't be big enough to fit a sandwich.


Fold the strip in half, and tuck the bottom edge under the top edge.


You are going to be sewing over this, to hold it in place. You are looking at what will be the lined, inside of the bag.


Now, fold the rest up so that you will have a lip on top that will fold over to close the bag.


Pin everything in place, and add your Velcro.


Here is an example using the side piece, to line the larger bag.

See how it's zigzagged after?


Then, same thing for the sandwich bag... fold it up to where you want it. I decided to have the TJ Maxx label inside.


Sew the sides.


Add the Velcro.


Here's how the snack bag looks.


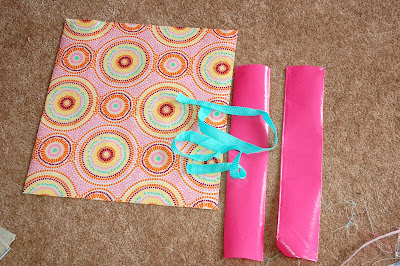
This is what I had left over after making 2 sandwich bags and 3 snack bags... Part of one side, the straps, and the bottom.

Cut the bag front and back to whatever size you think you will need for the lunch bag. I made one front/back piece longer than the other, so I could turn it and sew it, and the top of the front and back would both have a finished edge.


Cut the sides as long as the front, and the bottom as wide. Make sense?


Start sewing the sides on.


Then the bottom.

Then sew the back to the sides.


Sew the bottom to the sides and back.


Should look like this. You will need to trim everything up, including the threads.


Turn it right side out.

Reattach the straps. You can use a seam ripper to remove the old one if you want.

You can add velcro to the top of the bag if you want.

FINISHED!!!
You're child will be stylin' in the lunch room!

You might also want to look at:

10 minute Apron - Reusable Bag
First Aid Kit - Reusable Bag
Reusable Lunch Set - Reusable Bag
Party Set - Reusable Bag
$.25 Wallet - Reusable Bag
DIY Jewelry Organizer - Reusable Bag
Pillow Sham - Reusable Bag


Have a Happy and Creative Day!

Risa

Friday, March 30, 2012

DIY First Aid Kit / Travel Kit Tutorial {Reusable Shopping Bag - part 2}


DIY FIRST AID KIT

You can make between 7 and 9 first aid kits for $1, plus the cost of the zip lock bags. I am about to show you how...

You will need:

1 large reusable shopping bag - I got mine at TJ Maxx.
Zip lock sandwich bags, or whatever size bags you want. I used standard sandwich size, and small bags found in the jewelry section of Hobby Lobby.


This is another super easy project!!! You will be so proud of yourself when you are finished.

Step 1:

Cut you bag apart as pictured below. You might want to leave the finished edges on the side pieces, as pictured below. I did it for one and not the other, and prefer having the finished edge.


See, when they are folded up, they look even better with the piping around the edge.


Step 2:

Lay whatever bag you are using over your re-usable shopping bag, and cut strips. If you don't mind the bags hanging over the sides of the re-usable shopping bag, you will be able to get 9 out of one bag, but if you prefer they be covered, you will be able to get 7. You will be able to get 4 to 6 kits (depending on the inside bag size) from the front and back, 2 from the sides, and 1 from the bottom.


Step 3:

Cut the remaining pieces into strips that are the same width as the kit.


Fold in thirds if you want to have no exposed edges. If you are okay with exposed edges, just cut a piece in the size you want.


Step 4:

Lay your bags so that their bottoms overlap, and leave enough room on top that the flap will be able to be folded over after it is finished. I prefer using the finished edge, or top of the shopping bag for the flap. It will give a more finished look.


Place the strip you folded over the overlapping bags.


Pin in place. The bags have a tendency to move a bit. You might have to adjust them even as you sew.


Step 5:

Sew everything in place in the shape of a rectangle.


Step 6:

Place two (or desired amount) of self-adhesive Velcro circles on the inside flap, and outside cover, wherever you think they need to be. You shouldn't need to sew these. They are very sticky.


Fill your pack with whatever you want. This is an option we are looking at for Girls Camp First Aid Kits. I am thinking if the girls don't feel they need a first aid kit after the fact, they can use them for a travel bag.

Remember, my giveaway for the apron I shared on Studio 5 yesterday, ends today at 6pm. You can enter HERE.


You might also want to look at:

10 minute Apron - Reusable Bag
First Aid Kit - Reusable Bag
Reusable Lunch Set - Reusable Bag
Party Set - Reusable Bag
$.25 Wallet - Reusable Bag
DIY Jewelry Organizer - Reusable Bag
Pillow Sham - Reusable Bag


Have a Happy and Creative Day!

Risa

Thursday, March 29, 2012

GIVEAWAY!! 10 Minute Apron Tutorial {Reusable Shopping Bag - Part 1}

I think blogger is up and working now. If you left me a comment before, I have saved it, and will include it in the drawing for the apron I am giving away from today's Studio 5 show. If you haven't entered the drawing for the FREE APRON yet, please do so, by following the directions at the end of this post.

Here is the clip from today's show. It was SO FUN! Like I always say... I LOVE the producers, the hosts, the camera guys {even when I tell them I need good (non-fat) angles, and they probably think I am nuts!}, as well as the other contributors I get to meet. I am so lucky to get to do this!!! I feel like I learn so much every time I go on. I love you all - thanks!


By the way... I will be posting six more tutorials for the other items I shared on Studio 5 today, so please come back to see them!


Do you have an apron hanging in your kitchen that you never put on, because you are afraid to get it dirty, and don't know how it will look after you put it through the wash?

I have a solution for you (that you will never have to iron), and it only costs $1!


This is easy and inexpensive gift to give a friend or teacher. This apron can do double duty in the kitchen and the yard. You could even make these with your daughter and her friends.

All you need is a reusable shopping bag, and about 10 minutes!

Step 1:

Cut the sides out of a reusable shopping bag, leaving the raw edges on the main body of the bag.


Step 2:

Find a mirror, and hang one side of the shopping bag around your neck.
This will be the top of your apron.


Step 3:

Fold the bag up until you reach the desired length for your apron. Your bag will naturally fold along the bag's bottom (the dark blue pictured above.)


I like to leave the folds unfinished, because this will act as extra storage pockets. If it bugs you, all you need to do is sew it closed, and cut the excess from the back of the apron.


Step 4:

Cut the strap off the bottom of your apron.


Step 5:

Pin the strap where you want it on each side.


Then, cut the strap in half. This will be your side ties. I know it looks small. Depending on who you are making this for, you have a couple options:

1) If it is for a child, or smaller woman, you can leave it, to be tied in a small knot in back.
2) You can add Velcro to each side strap.
3) You can replace the straps with your favorite ribbon.

I just used the small straps.


Step 6:

Fold the apron in half long way, and cut off the sides.


It will look like this when it is open.


Step 7: Pockets!

Take the side pieces you cut off in the beginning, and lay them with the top up on top of the apron. Decide where you want them, and how long you want them to be.


Cut off the bottom, and pin to the apron.


Step 8:

Sew each side together. Sew around the sides and bottom of each pocket.


Step 9:

Sew the straps in the same manner they were sew to the bag originally.


Try on your apron, and decide if you want Velcro on the side straps, or what you want to do.


Have fun looking sassy in your new apron that you are not afraid to get dirty!


Was that the easiest 10 minutes you ever spent on a project? When I showed this to my friend, she said she wanted one for when she makes dinner, because it would be so nice to be able to just wipe it off when you are finished!

I agree. This apron looks like it was purchased at a boutique! It can be our little secret.

GIVEAWAY!!!

Now for the fun part! I will be sending the apron we make on the show today to one lucky person. All you need to do to enter, is:

Become a follower of my blog.
Like me on faecbook.
Leave me a comment (with contact info).

The giveaway will close Friday night at 6pm - in two days. The winner will be posted Sat morning, and the apron mailed out Monday morning. If you do not provide contact info (IE, e-mail address) in your comment, and are chosen winner, I will not be able to contact you. So please leave a comment with your info! Good luck, and thanks in advance for your support!

You might also want to look at:

10 minute Apron - Reusable Bag
First Aid Kit - Reusable Bag
Reusable Lunch Set - Reusable Bag
Party Set - Reusable Bag
$.25 Wallet - Reusable Bag
DIY Jewelry Organizer - Reusable Bag
Pillow Sham - Reusable Bag

Have a Happy and Creative Day!

Risa
Posted by Picasa
Related Posts Plugin for WordPress, Blogger...